Refresh
2025-06-25T17:05:45.912Z
The CachyOS installer is beautiful, if a little tricky
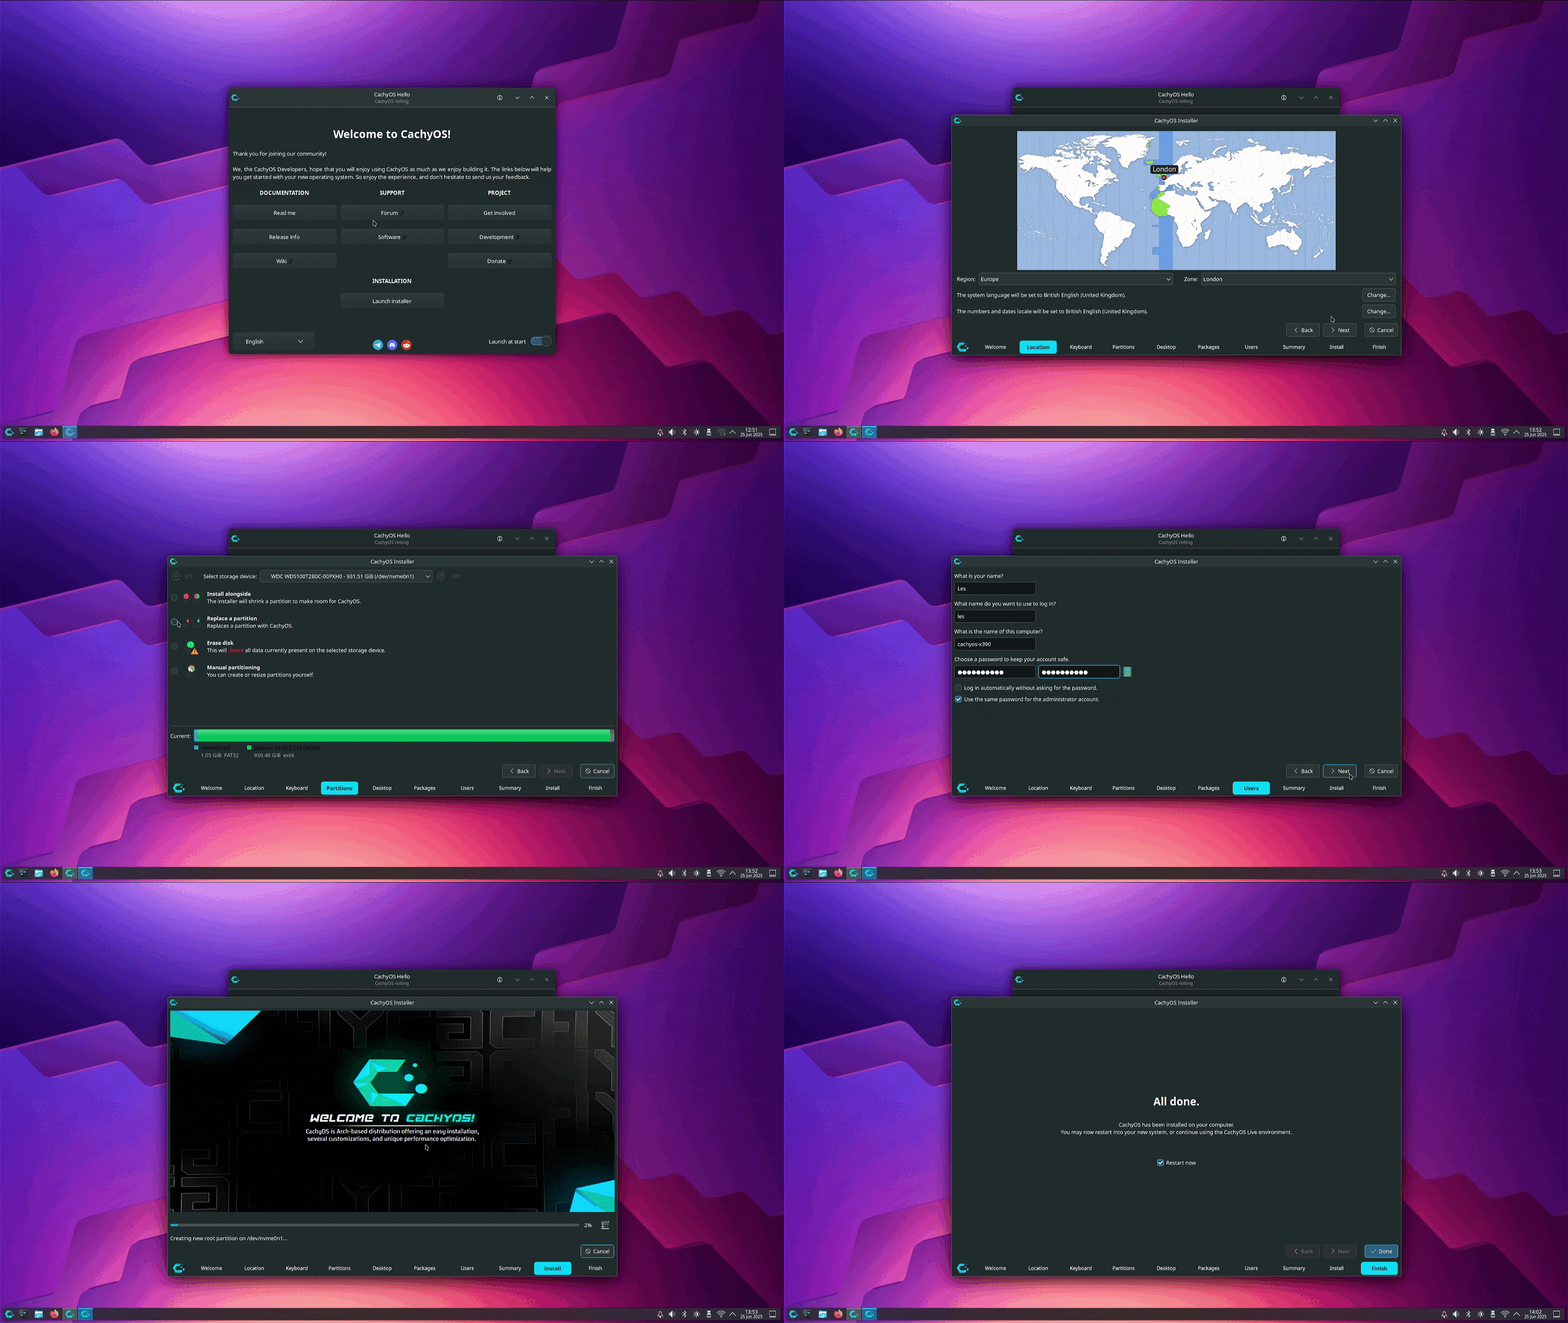
I love the CachyOS installer. It feels premium and it is a joy to use. Most of the time. There were a couple of times during the install process where I got a little lost.
The first is when I was asked about which Bootloader I would like to use. Typically I would select Grub, but Systemd-boot was selected by default. Why? I used Grub in the end, but a Windows user would have an issue here.
The second issue was the additional package installer. It was like going into a restaurant and being offered a surprise menu of tasty treats, but with little knowledge as to what they are.
But the installer progressed and I was soon ready to boot CachyOS from a fresh install.
2025-06-25T11:31:59.090Z
I remember when installing Linux meant grabbing a load of blank CDs, downloading multiple CD-ROM ISO images and then hoping that none of them were borked during the multi-day download (25 years ago! I am old!). Once, when downloading Mandrake Linux, I had a corrupt ISO image and that lost me a fair few hours!
Now, and for the last decade, we just download the ISO image and write it to one of the many USB sticks that we strewn across our desks. But, if you have never done it before, how do you write an ISO image to a USB stick?
For this you will need some software. Personally, I use Rufus. But I have been known to dabble with Raspberry Pi Imager and Balena Etcher.
Rufus is a simple application that asks us to identify the target USB drive, and the ISO image that we want to write to it. Click Start, answer the questions and you will soon have a USB stick with your chosen Linux OS.
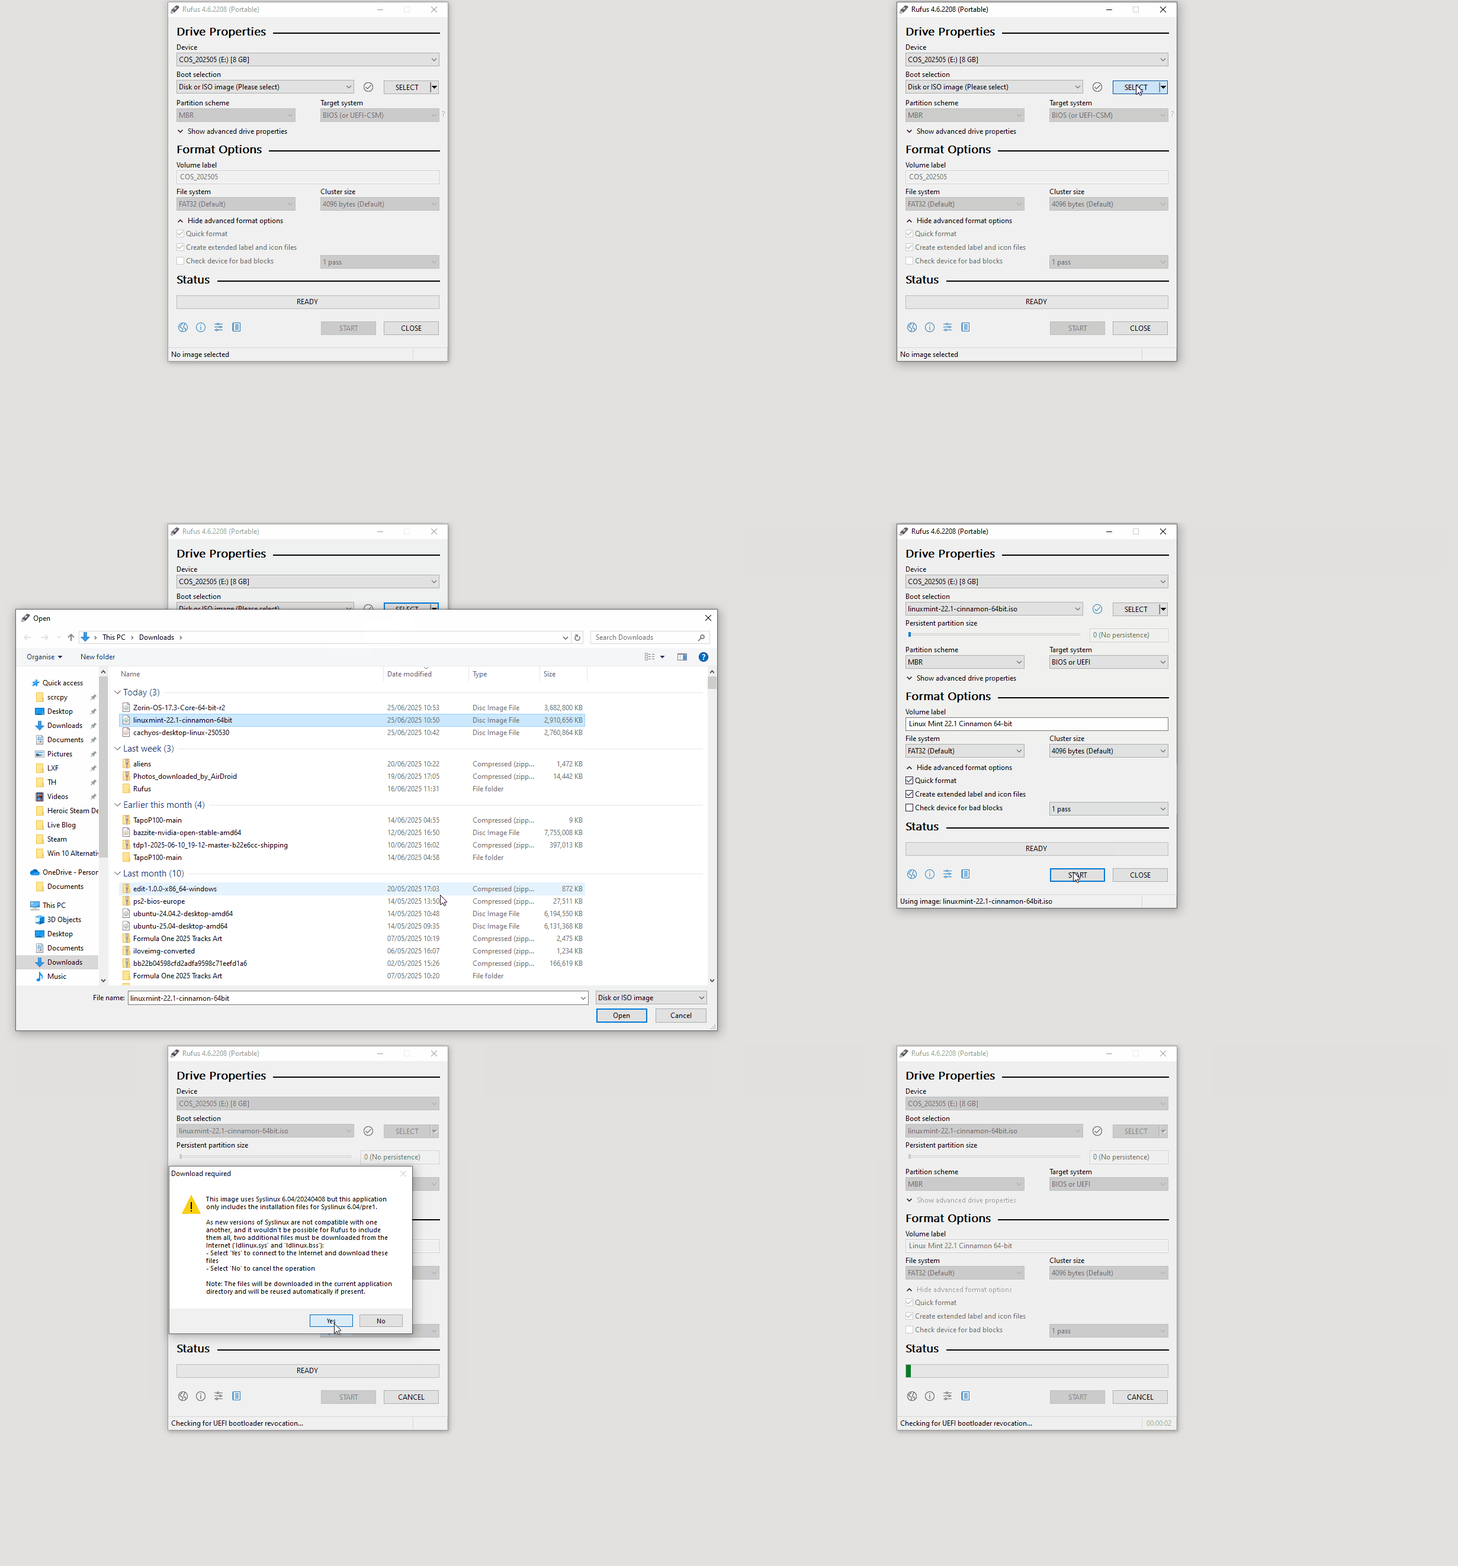
So far I've created a Live USB for CachyOS and I am using that to install the OS on to my Lenovo X390 laptop with 8GB and an Intel Core i5-8265U.
But wait! What is a Live USB?
Remember back to my days downloading ISO images? Those images would boot, but directly into the installer. A bit like Windows 95/98/XP did in the day. You couldn't test anything out before commiting to an install. Live CDs were a hybrid of a bootable test version where we could check that our system worked before clicking on install. Over the years, as ISO images got larger, they needed DVDs and now USB. The Live USB gives us a chance to "try before we buy" and they can also be used to fix a broken system.
Live USBs are a Swiss Army knife for fixing broken computers, retrieving data and yes, for testing out new distros without breaking your hardware.

 6 months ago
17


 English (US) ·