 6 months ago
14
6 months ago
14
To accompany our cargo bike shopper's guide, here's the other you'll want.
Credit: LueratSatichob/Getty Images
If you've read our cargo e-bike shopper's guide, you may be well on your way to owning a new ride. Now comes the fun part.
Part of the joy of diving into a new hobby is researching and acquiring the necessary (and less-than-necessary) stuff. And cycling (or, for the casual or transportation-first rider, “riding bikes”) is no different—there are hundreds of ways to stock up on talismanic, Internet-cool parts and accessories that you may or may not need.
That’s not necessarily a bad thing! And you can even get creative—PC case LEDs serve the same function as a very specific Japanese reflective triangle that hangs from your saddle. But let’s start with the strictly necessary.
This article is aimed at the fully beginner cyclist, but I invite the experienced cyclists among us to fill the comments with anything I’ve missed. If this is your first run at owning a bike that gets ridden frequently, the below is a good starting point to keep you (and your cargo) safe—and your bike running.
First thing’s first: Safety stuff
Helmets
I once was asked by another cargo bike dad, “Are people wearing helmets on these? Is that uncool?”
“You're already riding the uncoolest bike on earth—buy a helmet,” I told him.
For the most part, any helmet you pick up at a big box store or your local bike shop will do a perfectly fine job keeping your brains inside your skull. Even so, the goodly nerds over at Virginia Tech have partnered with the Insurance Institute for Highways Safety (IIHS) to rate 238 bike helmets using the STAR evaluation system. Sort by your use case and find something within your budget, but I’ve found that something in the $70–$100 range is more than adequate—any less and you're sacrificing comfort, and any more and you won't notice the difference. Save your cash.
Giro, Bell, Smith, POC, and Kask are all reputable brands with a wide range of shapes to fit bulbous and diminutive noggins alike.
Additionally, helmets are not "buy it for life" items—manufacturers recommend replacing them every four to five years because the foam and glues degrade with sun exposure. So there's a built-in upgrade cycle on that one.
Lights
Many cargo e-bikes come with front and rear lights prewired into the electric system. If you opted for an acoustic bike, you’ll want to get some high-lumen visibility from dedicated bike lights (extra bike nerd bonus points for a dynamo system). Front and rear lights can be as cheap as you need or as expensive as you want. Depending on the brands your local bike shop carries, you will find attractive options from Bontraeger, Lezyne, and Knog. Just make sure whatever you’re buying is USB-rechargeable and has the appropriate mounts to fit your bike.
Additionally, you can go full Fast and the Furious and get nuts with cheap, adhesive-backed LEDs for fun and safety. I’ve seen light masts on the back of longtails, and I have my Long John blinged out with LEDs that pulse to music. This is 82 percent for the enjoyment of other bike parents.
A minimalist’s mobile toolkit
You will inevitably blow a tire on the side of the road, or something will rattle loose while your kid is screaming at you. With this in mind, I always have an everything-I-need kit in a zip-top bag in my work backpack. Some version of this assemblage lives on every bike I own in its own seat bag, but on my cargo bike, it’s split between the pockets of the atrociously expensive but very well thought-out Fahrer Panel Bags. This kit includes:
A pocket pump
Lezyne is a ubiquitous name in bike accessories, and for good reason. I’ve had the previous version of their Pocket Drive mini pump for the better part of a decade, and it shows no sign of stopping. What sets this pump apart is the retractable reversible tube that connects to your air valve, providing some necessary flexibility as you angrily pump up a tire on the side of the road. I don’t mess with CO2 canisters because I’ve had too many inflators explode due to user error, and they’re not recommended for tubeless systems, which are starting to be far more common.
If you spend any amount of time on bike Instagram and YouTube, you've seen pocketable USB-rechargeable air compressors made to replace manual pumps. We haven't tested any of the most common models yet, but these could be a solid solution if your budget outweighs your desire to be stuck on the side of the road.
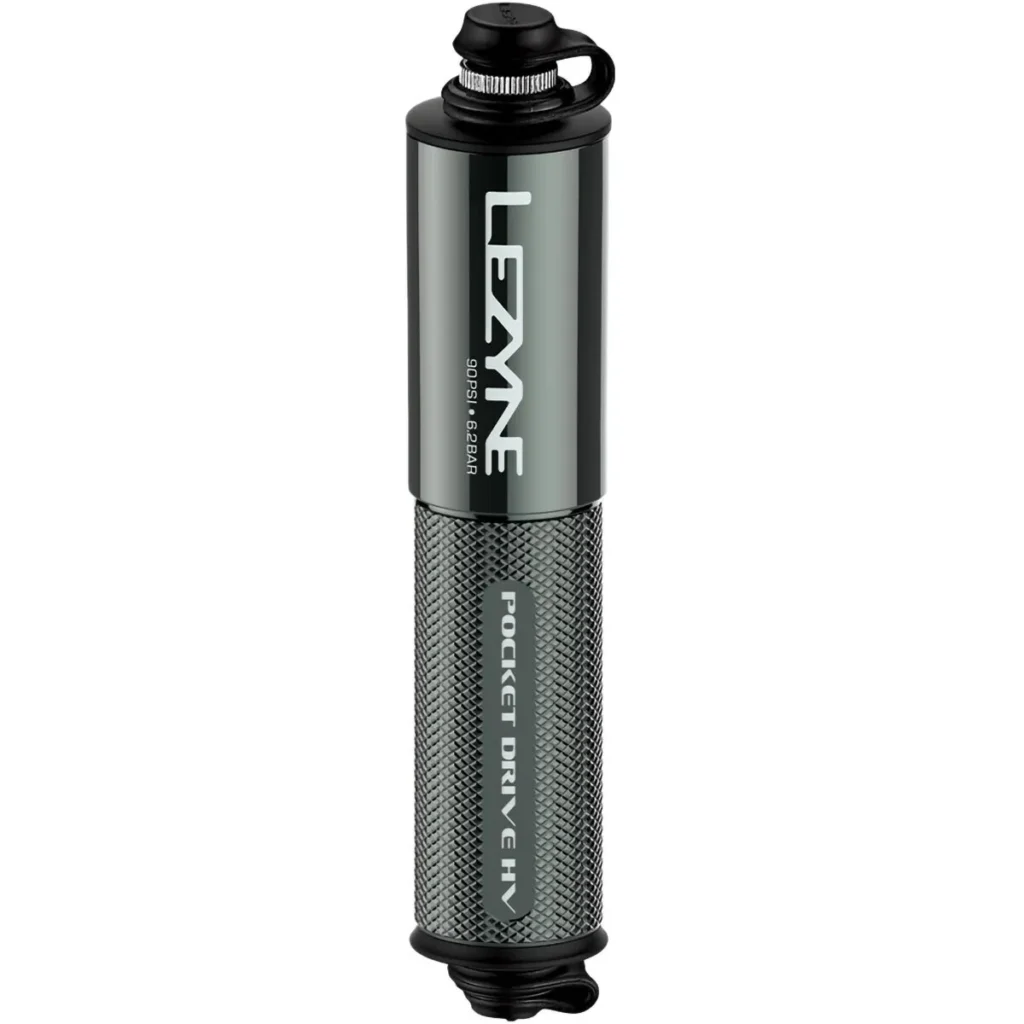
The Pocket Drive HV Pump from Lezyne.
A multi-tool
Depending on the style and vintage of your ride, you’ll have at least two to three different-sized bolts or connectors throughout the frame. If you have thru-axle wheels, you may need a 6 mm hex key to remove them in the event of a flat. Crank Brothers makes what I consider to be the most handsome, no-nonsense multi-tools on the market. They have tools in multiple configurations, allowing you to select the sizes that best apply to your gear—no more, no less.
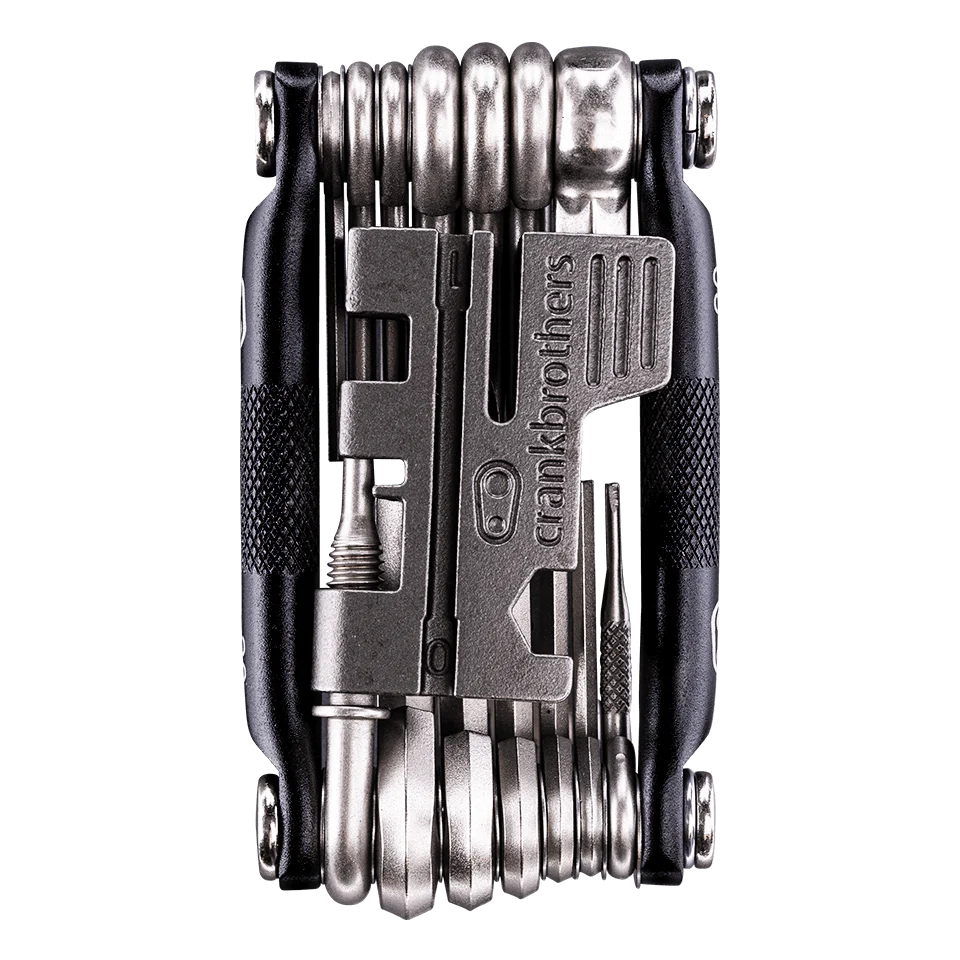
The M20 minitool from Crank Brothers. Credit: Crankbrothers
Tube + patch kit
As long as you’re not counting grams, the brand of bike tube you use does not matter. Make sure it’s the right size for your wheel and tire combo and that it has the correct inflator valve (there are two styles: Presta and Schrader, with the former being more popular for bikes you’d buy at your local shop). Just go into your local bike shop and buy a bunch and keep them for when you need ’em.
The Park Tool patch kit has vulcanization glue included (I’d recommend avoiding sticker-style patches)—they’re great and cheap, and there’s no excuse for excluding them from your kit. Park Tool makes some really nice bike-specific tools, and they produce This Old House-quality bike repair tutorials hosted by the GOAT Calvin Jones. In the event of a single failure, many riders find it sensible to simply swap the tube and save the patching for when they're back at their workbench.
With that said, because of their weight and potentially complicated drivetrains, it can be a bit of a pain to get wheels out of a cargo bike to change a tire, so it's best to practice at home.
A big lock
If you’re regularly locking up outside an office or running errands, you’re going to need to buy (and learn to appropriately use) a lock to protect your investment. I’ve been a happy owner of a few Kryptonite U-Locks over the years, but even these beefy bois are easily defeated by a cordless angle grinder and a few minutes of effort. These days, there are u-locks from Abus, Hiplok, and LiteLok with grinder-resistant coatings that are eye-wateringly expensive, but if your bike costs as much as half of a used Honda Civic, they're absolutely worth it.
Thing retention
Though you may not always carry stuff, it’s a good idea to be prepared for the day when your grocery run gets out of hand. A small bag with a net, small cam straps, and various sizes of bungee cords has saved my bacon more than once. Looking for a fun gift for the bike parent in your life? Overengineered, beautifully finished cam buckles from Austere Manufacturing are the answer.
Tot totage
Depending on whether we’re on an all-day adventure or just running down to school, I have a rotating inventory of stuff that gets thrown into the front of my bike with my daughter, including:
- An old UE Wonderboom on a carabiner bumping Frozen club remixes
- A small bag with snacks and water that goes into a netted area ahead of her feet
And even if it’s not particularly cool, I like to pack a camping blanket like a Rumpl. By the time we’re on our way home, she is invariably tired and wants a place to lay her little helmeted head.
Floor pump
When I first started riding, it didn’t occur to me that one should check their tire pressure before every ride. You don’t have to do this if your tires consistently maintain pressure day-to-day, but I’m a big boy, and it behooves me to call this out. That little pump I recommended above? You don’t want to be using that every day. No, you want what’s called a floor pump.
Silca makes several swervy versions ranging from $150 all the way up to $495. With that said, I’ve had the Lezyne Sport Floor Drive for over 10 years, and I can’t imagine not having it for another 20. Mine has a wood handle, which has taken on some patina and lends a more luxurious feel, and most importantly, it’s totally user-serviceable. This spring, I regreased the seals and changed out the o-rings without any special tools—just a quick trip to the plumbing store. I was also able to upgrade the filler chuck to Lezyne’s new right-angle ABS 1.0 chuck.
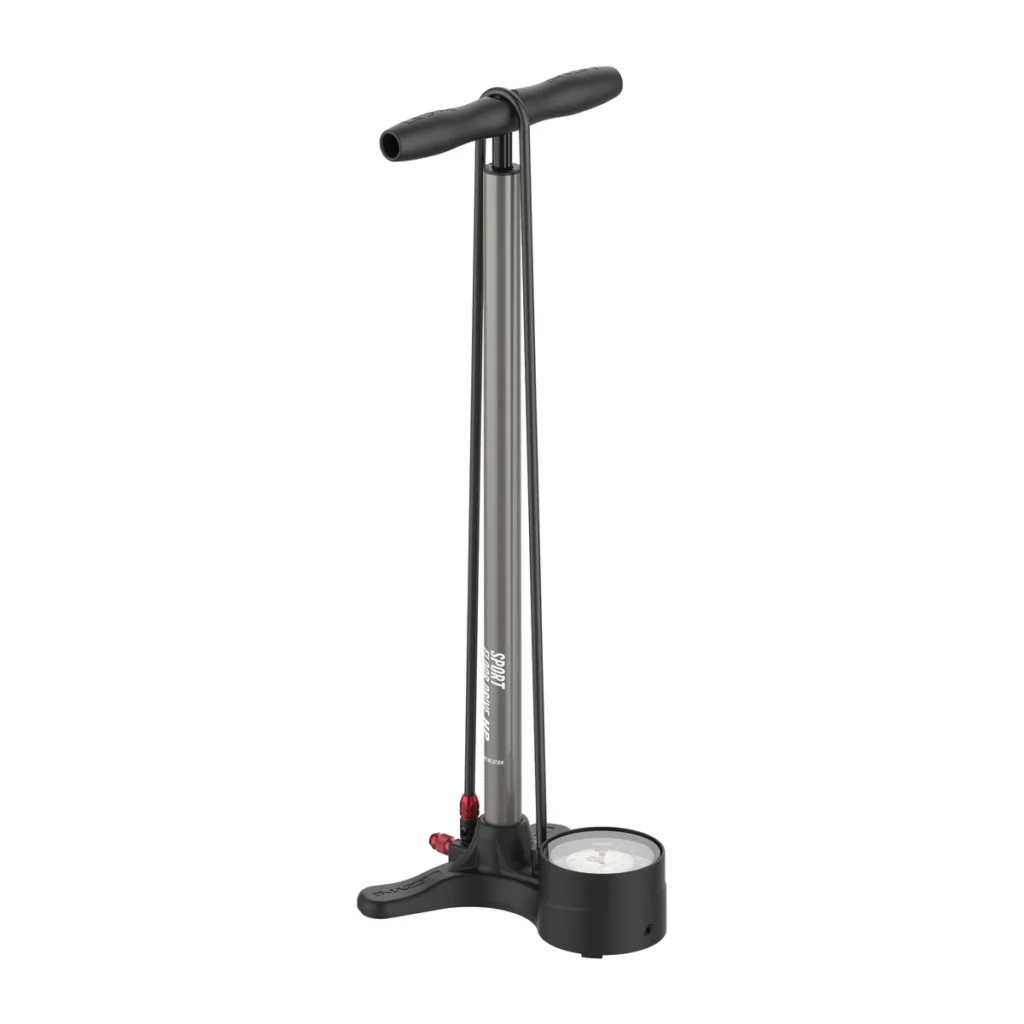
The Lezyne Sport Floor Drive 3.5.
No matter what floor pump you go for, at the very least, you’ll want to get one with a pressure gauge. Important tip: Do not just fill your tires to the max pressure on the side of the tire. This will make for an uncomfortable ride, and depending on how fancy of a wheelset you have, it could blow the tire right off the rim. Start with around 80 PSI with 700x28 tires on normal city roads and adjust from there. The days of busting your back at 100 PSI are over, gang.
Hex wrenches
Even if you don’t plan on wrenching on your own bike, it’s handy to have the right tools for making minor fit adjustments and removing your wheels to fix flats. The most commonly used bolts on bikes are metric hex bolts, with Torx bolts used on high-end gear and some small components. A set of Bondhus ball-end Allen wrenches will handle 99 percent of what you need, though fancy German tool manufacturer Wera makes some legitimately drool-worthy wrenches.
If you have blessed your bike with carbon bits (or just want the peace of mind that you’ve cranked down those bolts to the appropriate spec), you may want to pick up a torque wrench. They come in a few flavors geared at the low-torque specs of bikes, in ascending price points and user-friendliness: beam-type, adjustable torque drivers, and ratcheting click wrenches. All should be calibrated at some point, but each comes with its own pros and cons.
Keep in mind that overtightening is just as bad as undertightening because you can crack the component or shear the bolt head off. It happens to the best of us! (Usually after having said, “I don’t feel like grabbing the torque wrench” and just making the clicking sound with your mouth).
Lube
Keeping your chain (fairly) clean and (appropriately) lubricated will extend its life and prolong the life of the rest of your drivetrain. You’ll need to replace the chain once it becomes too worn out, and then every second chain, you’ll want to replace your cassette (the gears). Depending on how well you’ve cared for it, how wet your surroundings are, and how often you’re riding, an 11-speed chain can last anywhere from 1,000 to 1,500 miles, but your mileage may vary.
You can get the max mileage out of your drivetrain by periodically wiping down your chain with an old T-shirt or microfiber towel and reapplying chain lube every 200–300 miles, or counterintuitively, more frequently if you ride less frequently. Your local shop can recommend the lube that best suits your climate and riding environment, but I’m a big fan of Rock’n’Roll Extreme chain lube for my more-or-less dry Northern California rides. The best advice I’ve gotten is that it doesn’t matter what chain lube you use as long as it’s on the chain.
Also, do not use WD-40. That is not a lubricant.
That’s it! There may be a few more items you'll want to add over time, but this list should give you a great start. Get out there and get riding—and enjoy the hours of further research this article has inevitably prompted.


 English (US) ·